

The Manage Projects dialog box allows you to seamlessly switch between the projects you have access to, rename, remove, and create projects.
If required, scenarios can be imported from the project you have access to, to the project you occupy.
To open the Manage Projects dialog box
- Click the projects' menu in the toolbar, then select Manage projects. The Manage Projects dialog box will open.
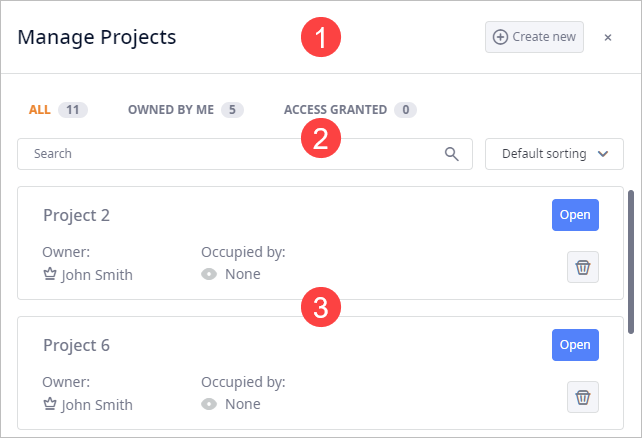
The Manage Projects dialog box comprises:
- The header with the Create new control that creates a new project.
- A set of filters and a sorting controls.
- Project tiles.
The set of filters and sorting controls differs for the Professional Server and desktop versions.
- Sorting and filtering in the anyLogistix Professional Server
-
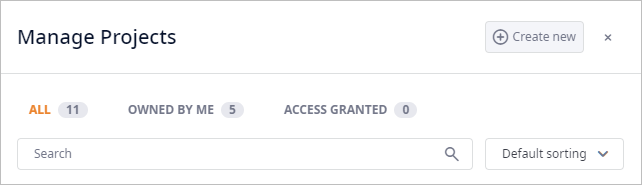
- ALL — [selected by default] shows all projects of all users that are stored in the database.
- OWNED BY ME — shows projects owned by the current user (either created by this user, or assigned to this user).
- ACCESS GRANTED — shows projects shared with the current user.
- Search — use the search to find the required project by name.
- Sorting type:
- Sorting and filtering in the anyLogistix desktop version
-
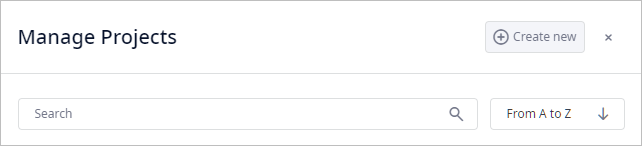
- Search — use the search to fine the required project by name.
-
Sorting type:
- From A to Z — descending alphabetical order.
- From Z to A — ascending alphabetical order.
Project tiles show basic information with certain controls, allowing you to manage the project.
The content inside the project tiles differs for the Professional Server and desktop versions.
- Project tiles in the anyLogistix Professional Server edition
-

The tile comprises:
- Tile title — contains the name of the project the tile belongs to.
-
Owner — shows the name of the
project owner.
The icon is added to the owner's name.
- Occupied by — shows the name of the user occupying the project.
- Open — click to open the project.
-
 — click to remove the project.
-
No access labels - substitute the Open button, indicate why a project cannot be opened by a user:
-
 — the project is occupied by someone else.
-
 — user has no access to this project.
-
- Project tiles in the anyLogistix desktop edition
-

The tile comprises:
- Tile title — contains the name of the project the tile belongs to.
- Open — open the project.
- Remove — click to remove the project.
To switch from the current project to another project
- Click the name of your current project in the toolbar, and select Manage projects from the drop-down menu.
The Manage projects dialog box will open with a list of available projects.
-
In the required project's tile click Open.
-
How can we improve this article?
-