

The Structure view shows logic structure of the scenario. It depicts the main elements of the supply chain (customers, distribution centers, factories, suppliers) with their connections.
The structure of the supply chain cannot be altered here. Navigate to the basic anyLogistix tables (the set depends on the scenario type) to manage the connections: Demand, Paths, Sourcing, Shipping, Inventory, Product Flows and Product Storages.
The Structure view allows you to reorganize and filter the elements on its layout, making the whole idea of the supply chain look more intelligible.
If objects of different type are placed in one node, such node will have the anyLogistix icon instead of the objects' icons.
You can pan and zoom the structure like you do it on the map.
To switch to Structure view
- Open the required scenario.
-
Navigate to the map view and click
 Structure view in the top left corner of the map.
The Structure view will open.
Structure view in the top left corner of the map.
The Structure view will open.
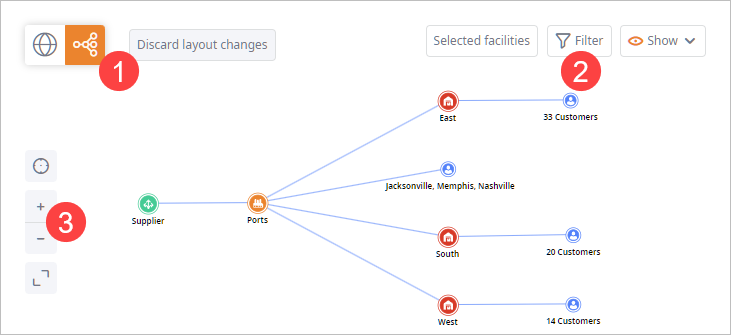
The Structure view contains the following sets of controls to work with:
- GIS map / Structure view — toggles the view shown to a user (GIS map / scenario logic structure).
- Filters — use them to filter the elements that are shown in the structure.
- Scale / Size — use controls to zoom the structure, change its window size, center the supply chain structure.
| Button | Name | Description |
|---|---|---|
|
|
Map view | Switches the layout to GIS map view. |
|
|
Structure view | Switches the GIS map view to scenario Structure view. The Structure view shows logic structure of the scenario. |
| Discard layout changes | [Available if a user changes the default structure layout] resets the user-defined structure layout. |
| Button | Name | Description |
|---|---|---|
| Selected facilities | Opens the Selected facilities section with a list of objects in the selected node of the supply chain structure. | |

|
Filter | Opens the dialog box with filter parameters. |

|
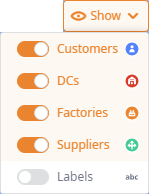
Show |
Opens the drop-down list of controls, which allows you to toggle visibility of the following elements on the map: Customers, DCs, Factories, Suppliers, Labels (a label of a facility is the value of the Name column in the corresponding table).
|
| Button | Name | Description |
|---|---|---|

|
Center structure | Fits the current supply chain structure in the center of the visible area. The supply chain structure may be rescaled to fit in the Structure view. |

|
Zoom in | Zooms in by one level per click. Alternatively, you can zoom with your mouse wheel. |

|
Zoom out | Zooms out by one level per click. Alternatively, you can zoom with your mouse wheel. |

|
Expand | Increases the size of the working area, offering more space to observe the required connections or objects. The Input data and experiments, and the Dashboard sections will be minimized. |

|
Minimize | Minimizes the working area to its default size. |
The filter parameters allow you to manually specify the objects to filter. The parameters are:
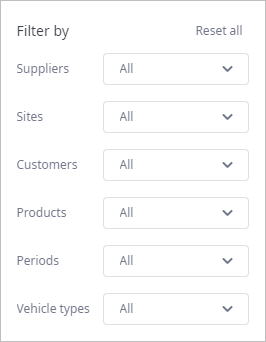
- Reset all — removes all the defined filters. All elements become visible on the structure.
- Suppliers — filters suppliers, leaving only the selected elements on the structure.
- Sites — filters sites (distribution centers, factories), leaving only the selected elements on the structure.
- Customers — filters customers, leaving only the selected elements on the structure.
- Products — filters paths. The structure will depict only the objects with the paths that are used to deliver the selected products.
- Periods — filters paths. The structure will depict only the objects with the paths that are used within the selected period.
- Vehicle types — [not available in GFA scenario] filters paths. The structure will depict only the objects with the paths that are used by the selected vehicle type.
Elements of the structure can be inspected in the Selected Facilities section.
To inspect elements in the Structure view
-
Switch to the Structure view by clicking the Structure view
icon in the top left corner of the map.
-
In the Structure view open the Selected Facilities section by doing either of the following:
- Click the Selected Facilities button in the filters group of controls.
-
Double-click any element of the depicted structure.
Hold Ctrl (macOS: Cmd) while clicking to select more than one element.
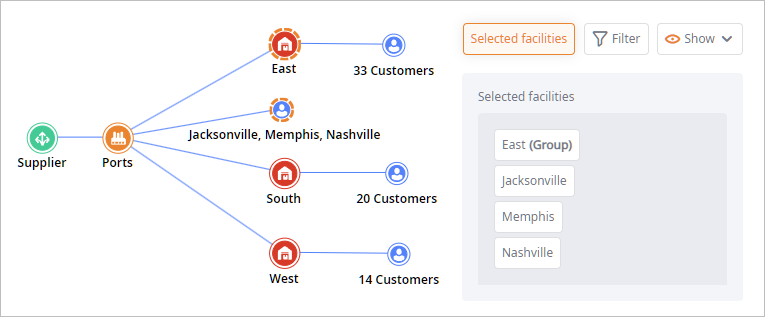
- Click the required item in the Selected Facilities to navigate to the table containing it. The table will open below the Structure view.
To filter elements
-
Click the
 Filter button, to open filter options.
-
Then click the drop-down list to the right of the required parameter
and select the checkboxes of the required elements to highlight.
Certain connections between the structure elements may become invisible depending on the selected filter options.
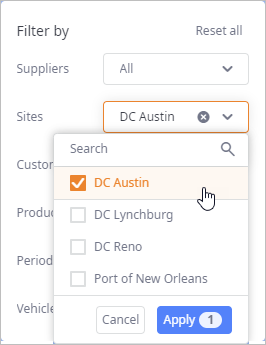
- Click Apply to apply the changes. The structure will now show only the selected objects. Other connections and the non-selected objects will be hidden.
- If required, click Reset all to removes all defined filters.
-
Click the
 Filter icon again to close the filter dialog box.
To hide elements
- Click the Show button to open the drop-down list of controls allowing you to toggle
visibility of the element types on the structure.

- Click the required toggle-button to hide / show certain element types.
To reorganize the elements in the Structure view
-
Switch to the Structure view by clicking the Structure
icon in the top left corner of the map.
-
Click and drag the required element to the desired position.
Press Alt (or Option for macOS) to drag the element with the children nodes. Other connections will be automatically adjusted.
The structure of the supply chain cannot be altered here. Navigate to the Sourcing table to manage the connections.
- Use the Ctrl + Z (macOS: Cmd + Z) shortcut to undo the previous action.
-
How can we improve this article?
-